Monday, December 19, 2011

Sephora Haul

I had a blast at Sephora today :) The workers were awesome and so friendly! The ladies there loved my nails that I did, the Rainbow Shatter. If any of the ladies who work at Sephora in Old Town are reading this: THANK YOU for the awesome shopping experience you guys were sooo nice and sweet!

Alright on to the first product!

This first item is Clinique High Lengths Mascara. This is my point perk item of the day :) It's a cute little 3½ inch travel sized mascara. It's a white tube with a light lime green comb instead of a typical brush.

My first item is Sephora's Mini Heated Lash Curler. This is just a smidge over 3½ inches. It uses a single AAA battery. There is a double coil inside and has (the best way I can describe it) raised edges to keep from burning the skin. It is $12.


Now here is the item I've been dying to have for a while now *drum roll please?* NAKED by Urban Decay!!! YAYY!! It comes with 12 neutral colored eyeshadows, an eyeshadow brush, and a Urban Decay Eyeshadow Primer Potion with an applicator brush. There is also a good sized mirror included on the box. The box is 8" by 2½" and each eyeshadow is 1½" by ½". I got this for $48

The colors are:
Virgin
Sin
Naked
Sidecar
Buck
Half Baked
Smog
Darkhorse
Toasted
Hustle
Creep Gunmetal

I can't what to do all of the possibilities with this palette!!


Now the last product is a lifesaver for those of you who are like me who have an oily t-zone. You would do your makeup and it's all pretty and shine-free but a couple of hours into your day your nose is all shiny! GAH! And honestly bringing a whole compact and a brush and whipping it out in the middle of the day is such a hassle sometimes. So here's the lifesaver, it is a refillable powder brush. It's a little tricky to maneuver at first but after familiarizing a bit it's not so bad. It also twists open and close is it doesn't spill out when it's not in use. It is stands 5 inches tall and 1¼ inch in diameter and I bought it for $17.

Sunday, December 18, 2011

My Other New Blog :)

Janice Tong Photography

Here's a new blog I created on tumblr that is mostly concentrated on photography! :) Please visit the link above ^^^ :)

Saturday, December 17, 2011

Orofluido Beauty Elixir


I decided that it was time to do a post on my favorite hair product. I have frizzy bi-polar hair and from the coloring and using the blow drier and straightener and curler you can imagine my hair is damaged too! Orofluido Beauty Elixir is a hair saver definitely! But again different hair you get different results. I do have too say though that it is expensive but it is worth it and it is a pretty big bottle and with hair oil you only use a very small amount so it lasts a very long time. On the technical side it is made in Barcelona, Spain. It has Cyperus Oil from Egypt, Linseed Oil from the Mediterranean, and Argan Oil from Morocco. The oil isn't too thick and when a small amount is applied to wet hair it is very lightweight. It smells really good compared to other high end hair oils. It smells sweet and like vanilla.

How I use it:

I follow my regular hair routine in the shower, shampoo and conditioner. Before I get out I lightly wring my hair to squeeze out the excess water then I run a towel through my hair so that it is wet but not soaking and dripping all over the place. Then I put a small nickle size amount on my palm and rub it between my hand then comb it through my hair concentrating on the ends. Then I towel wrap my hair for a while. Me I'm trying to stay away from the heat so I air dry my hair but after applying the oil you can follow your regularly scheduled routine.

**When I use this I usually find my hair softer and less frizzy.

Have fun!

Rainbow Shatter


What I used:
OPI Black Shatter
OPI Feelin' Hot-Hot-Hot (Pink)
OPI Do You Lilac It? (Purple)
China Glaze White on White (White)
China Glaze For Audrey (Blue)
China Glaze Tree Hugger (Green)
Illamasqua Wayward (Yellow)
Makeup Sponge Chunks
Palette


1. Always use a base coat.
2. Start off with one coat of white. It doesn't need to be solid, just one layer is ok so the other color will show better. Let it dry.

**You can use any colors you want, but it is best to stick to lighter colors. I used pink, purple, blue, green & yellow.

3. Put a couple of drops of your first color onto the palette.
4. Using the makeup chunk, dab it in the color then stipple it onto a small portion of your nail. Let it dry, this is important because if it isn't dry it will blend with the other colors.

**It is a lot easier if you make you sponge chunks smaller and longer and with a semi-pointed edge.

5. Repeat 3 & 4 with the remainder of your colors in a new area of the nail, sometimes overlapping the previous color(s). You can choose to leave a white portion or you can cover it completely.
6. Once you've finished with the colors and it has dried use your one coat of your shatter polish. You can use any color shatter including gold and silver but I think that the black offers the best contrast.

**Hint: a thick layer of shatter will give you bigger chunks while a thin layer will give you thinner and finer lines. Be quick though the shatter gets chunky when exposed for too long.

7. Finish with a top coat.

Friday, December 16, 2011

New Fading Color Nails


I did a new Fading Color in Red. For a how-to on this go to the BLOG ARCHIVE on the right >>>> and look for Fading Color Nails in December 2011. I added a little twist by adding the Art Club Nail Art Gold Hologram Stars shown in Snowing Snowman and Mini Haul & Favorite Swatches. The top picture is under a lamp light and the bottom picture was taken with flash. I think this is a simple but pretty Christmas design.

Tuesday, December 13, 2011

Red & White Dot Tips


What I used:
OPI The Thrill of Brazil (red)
China Glaze White on White (white)
Finger Paint Easel Come, Easel Go (silver)
Essie Sugar Daddy (light pink)
Striping Brush
Dotting Tool
Scotch Tape

**DISCLAIMER: I found this on youtube then added my own little spin. http://www.youtube.com/watch?v=KXd_nxlEuKA thank you cutepolish!! :)


1. Always use a base coat.
2. I used one coat of Essie Sugar Daddy. Let it dry completely.
3. Take a strip of scotch tape and stick it on your palm once so it's not too sticky, then apply it onto your nail diagonally. (**hint: press down only half of the tape onto the nail then pop up the edge not stuck to your nail so it would be less likely to lift up. Make sure you press it down at the sides too.)
4. Use 2 coats of your base color. I used OPI The Thrill of Brazil. Let it dry.
5. Using your biggest dotting tool and your dots color, randomly dot the painted area. I used China Glaze White on White.
6. With the striping tool and and your stipe color draw the stripe under the painted area. Let everything dry. I used Finger Paints Easel Come, Easel Go.
7. Finish with a top coat.

OPI Pink Swatch


Today is I'm doing a swatch of OPI's Feelin' Hot-Hot-Hot and OPI's Sparrow Me The Drama.

Feeling Hot-Hot-Hot is a punchy just a smidge away from florescent pink. It's a super cute summer color. If you don't like punchy colors like this you can use it in a project like I did in my Leopard Print project

Sparrow Me The Drama is a part of the Pirates of the Caribbean collection. It's a cute, flirty, light pink.

Starbucks Holiday Cups 2011


My new cute little buy of the week :) I went into Starbucks and found this cute little cup. I bought the grande size but it also comes in a venti size. It has the typical Starbucks logo on the front with a fox and little squirrel on it with an airplane and banner saying 2011. The cool thing about this cup is that it comes with a color changing straw. I haven't tried it yet but it supposedly changes green when you fill it with a Starbucks holiday drink :)

Thursday, December 8, 2011

Snowing Snowman

  
What I used:
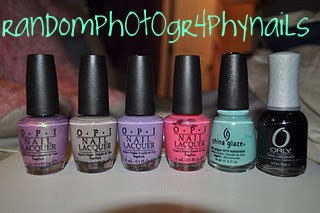
Nicole by OPI Razzle Dazzler (black, solid)
OPI Russian Navy (bottle looks dark purple but is really dark blue, shimmery)
OPI The Thrill of Brazil (red, solid)
China Glaze Sexy in the City (blue, shimmery)
China Glaze White on White (white, solid)
Essie Loophole (silver)
Essie Sugar Daddy (light pink, translucent)
China Glaze Lorelei's Tiara (silver & blue glitter)
China Glaze Fairy Dust (holographic glitter)
Palette
Sponge Chunks
Dotting Tools
Art Club Nail Art Gold Hologram Stars

**This is a time consuming project. You can not rush it.


**When you switch colors use a new sponge or switch it to and unused side.

***This is technically a 3-in-1 project you can put your own spin on it and do only the blue nails or only the snowman nails or you can do what I did and mix it together :)

Blue Nails:
1. Always use a base coat.
2. Then paint 1 coat of light pink. I used Essie Sugar Daddy. Let it dry.
3. On the palette put a couple of drops of silver. I used Essie Loophole.
4. Take a piece of sponge and lightly dip into the silver taking the excess by dabbing to the side of the polish.
5. Gently start from the tip and work your way down leaving 1-2 cm untouched by the silver. It should be super light. Let it dry.
6. Now repeat steps 1-3 but only going half way of the silver with blue. I used China Glaze Sexy in the City. Let it dry.
7. Repeat steps 1-3 again but stick to the very tips of your nails with dark blue. I used OPI Russian Navy. Let it dry.
8. Repeat steps 1-3 one more time with glitter. I used China Glaze Lorelei's Tiara.
9. Finish with a top coat.

Snowman Nails:

1. Always use a base coat.
2. Then paint 1 coat of light pink. I used Essie Sugar Daddy. Let it dry.
3. On the palette put a couple of drops of silver. I used Essie Loophole.
4. Take a piece of sponge and lightly dip into the silver taking the excess by dabbing to the side of the polish.
5. Gently start from the tip and work your way down leaving 1-2 cm untouched by the silver. It should be super light. Let it dry.
6. Now repeat steps 1-3 but only going half way of the silver with white. I used China Glaze White on White. Let it dry.
**Snowman time!
7. Using the biggest dotting tool create the body with white (I used China Glaze White on White) with a bigger circle on the bottom a smaller circle on top, leave a small space in between the two. Drawing these two circles you will have to make them bigger than what the dotting tool makes. Let it dry.
8. Using the biggest dotting tool make the eyes with black (I used Orly Liquid Vinyl) in the middle of the top circle and with the smallest dotting tool make 2 buttons with black on the bottom circle. With a medium dotting tool free hand draw the hat.
9. With a medium dotting tool make the inside eye circle with white.
10. With a medium dotting tool make the scarf free hand. I used OPI The Thrill of Brazil but you can use any color of your choice. Let it dry completely so it won't smear.
**Star time.
11. Using a dotting tool but a dot of clear polish on the side of the snowman, pick up the star and drop it on the clear polish while still wet.
12. Apply as many as you like.
13. Finish with a top coat. 

**DISCLAIMER: I found this on youtube then added my own little spin. http://www.youtube.com/watch?v=CBhzpiTNvPM Again, thank you IHaveACupcake!! :)

Mini Haul & Favorite Swatches

Sally Beauty Supply Mini Haul


A couple of new little additions to my collection includes:

A.S.P. Nail Art 4 Pack Brush Set. There are 3 brushes made for striping and 1 small flat brush.

China Glaze Lorelei's Tiara. It's a cute little concoction. The base is a gilted silver with blue glitter in it.

Art Club Nail Art Gold Hologram Stars. This is a little jar of open gold stars and small whole gold stars. You paint your nails with either your favorite color of just a clear coat, before it dries you apply the stars with tweezers then finish with a top coat.

Last is Ikonna Select-a-Style. The one I bought is a set of 12 flowers. You apply this just like you do with the stars.

Swatches

These are 4 of my favorite colors and on my thumb is a swatch of my new color.


My new color is China Glaze Lorelei's Tiara. Sorry for the typo on the picture. It is a dense silver glitter with blue glitter flecks.

Next is China Glaze For Audrey. Its a cute light robin's egg/teal color.

OPI Meet Me on the Star Ferry is an interesting color. I wanna call it a port wine kinda color but more purple. It also has a nice shimmer to it.

OPI Significant Other Color. In the bottle it is a light purple with a gold/green shimmer. On the nail it comes out sheer.

OPI My Private Jet. This is my favorite color. It is a dark grey color with a gold/red shimmer and small flecks of holographic glitter. It's super simple and cute.

Bumble Bee buzzzzz :)


 What I used:
China Glaze Secret Peri-Wink-Le (blue)
China Glaze White on White (white)
Illamasqua Wayward (Yellow)
Nicole by OPI Razzle Dazzler
Palette
Dotting Tool


This is a super cute project I did on my friend's nails. It's simple and fun :)

1. Always use a base coat.
2. Paint 2 coats of blue. I used China Glaze Secret Peri-Wink-Le
3. With a large dotting tool draw a horizontal oval on the middle finger for the body. Then draw 2 smaller vertical ovals on the top for the wings and a small line for the stinger. Last use a small dotter to draw a trail of dots. I used Nicole by OPI Razzle Dazzler.
4. With a medium dotting tool draw 2 yellow stripes on the body with yellow. I used Illamasqua Wayward.
5. With a small dotter make the eyes with white. I used China Glaze White on White.
6. Finish with a top coat! Yay!

Wednesday, December 7, 2011

The Candy Chef


I wanna take time out to talk about the Candy Chef. If you live in the Los Angeles area and you love candy (who doesn't?) then you've gotta come visit this place. You've all been to places like the Sweet Factory where they weigh candy and you end up leaving paying $20 for a tiny little bag? Well no more! This cute little shop is definitely a hidden gem. If you've been to the Boiling Crab on Main St. in Alhambra then you've passed by the shop. Facing the Boiling Crab go right a couple of shops and go down the alleyway, it's halfway in. Now I know "alleyway" WTF? I don't wanna go down an alley! No worries this place is legit! Its small but they have pretty much all of the same candy. The have gummy, chocolate, dried fruit, packaged candy, and collectable lunch boxes. They even make candy arrangements! Now you see that big tub of candy up there? ^^^ That tub was only $10!!! Well enough said! Seriously! GO VISIT THEM! You'll be happy!

The Candy Chef
27 West Main Street
Alhambra, CA 91801
(626) 789-5678
www.thecandychef.com

Leopard Print


 What I Used:
OPI Significant Other Color (the bottle is the gold shimmer purple but it comes out super light/translucent)
OPI French Quater for Your Thoughts (light grey)
OPI Do You Lilac It? (purple)
OPI Feelin' Hot-Hot-Hot (pink)
China Glaze For Audrey (robin's egg)
Orly Liquid Vinyl (black)
Dotting Tool


This is a super cute flirty project :) It's one of my favorites so far.

1. Always use a base coat.
2. For the base you can use and color for the base color. I used OPI French Quarter for Your Thoughts for the first and OPI Significant Other Color for the second. With the color of your choice paint 2 coats.
3. For the spots you can use any color as well. I Used OPI Do You Lilac It? OPI Feelin' Hot-Hot-Hot and China Glaze For Audrey. With the biggest dotting tool randomly dot you nails with you chosen colors.
4. With a small-medium dotting tool with black (I used Orly Liquid Vinyl) draw wonky C's and brackets around the spots.
5. Finish with a top coat.

Rawr. You're looking fierce. :) yupp I'm just that tacky :)

Snowman Nails


 What I used:
China Glaze White on White (white)
China Glaze For Audrey (robin's egg)
China Glaze Fairy Dust (small holographic glitter)
Orly Liquid Vinyl (black)
OPI The Thrill of Brazil (red)
Color Club Orna-Minted (Chunky Glitter) **a plus it smells like peppermint
Dotting Tool/Make Shift Dotting Tool


**DISCLAIMER: I found this on youtube then added my own little spin. http://www.youtube.com/watch?v=CBhzpiTNvPM Thank you IHaveACupcake

1. Always start with a base coat.
2. Paint 2 coats of red. I used OPI The Thrill of Brazil. OPI Vodka & Caviar is good too.
3. Paint 1 coat of small glitter. I used China Glaze Fairy dust.
4. Paint 1 coat of chunky glitter. I used Color Club Orna-Minted on all but ring fingers.
**Now it's time to create the snowman!
5. Using the biggest dotting tool create the body with white (I used China Glaze White on White) with a bigger circle on the bottom a smaller circle on top, leave a small space in between the two. Drawing these two circles you will have to make them bigger than what the dotting tool makes. Let it dry.
6. Using the biggest dotting tool make the eyes with black (I used Orly Liquid Vinyl) in the middle of the top circle and with the smallest dotting tool make 2 buttons with black on the bottom circle. With a medium dotting tool free hand draw the hat.
7. With a medium dotting tool make the inside eye circle with white.
8. With a medium dotting tool make the scarf free hand. I used China Glaze For Audrey a robin's egg color but you can use any color of your choice. Let it dry completely so it won't smear.
9. Finish with a top coat.

Newsprint Nail


What I used:
China Glaze Recycle (medium grey)
OPI French Quater for Your Thoughts (light grey)
China Glaze For Audrey (robin's egg)
Newspaper
Skissors
Rubbing Alcohol
Small Spritzer or Cotton Balls


1. Cut newspaper into 10 pieces that fit over your nail.


2. Always use a base coat.

**With this project you can use your own colors. You can go realistic and choose a light grey color but if you're feeling funky you can go pink or purple or any of your favorite colors but remember the ink is black so stay away from dark colors:)

3. For the first picture I used China Glaze Recycle (medium grey color on the blue tint) my nail broke :( so I did a take two with OPI French Quarter for Your Thoughts (light grey with a yellow/pink tint). I was feeling a little funky so I painted my ring finger China Glaze For Audrey
4. Let the polish dry completely or else the next step will mess up.
5. Using a spritzer spray the nail with rubbing alcohol or soak a cotton ball with rubbing alcohol and dab the nail completely.
6. Lay the newspaper piece over the nail and spray or dab with alcohol again then firmly press down with a rocking motion with your finger for 10-15 seconds.
7. Finish with a top coat.

If you want you can use comic strips instead of articles too!

Crazy Windstorm Damge


A crazy out of norm windstorm came through last Wednesday 11/30 night through Thursday 12/1. Around 1:00 a.m. Thursday, the power went out and sometime after that two big pine trees came down in the middle of the street causing no damage except for pulling down a single line with it. However the wind, which was rumored to be as high as 101mph, picked up an unripened pinecone a flung it into a rear windshield cause the only damage on the block. My neighbor who has lived here for 50 years said that she had never seen anything like this before, she was up all night but her husband slept soundly through the whole event. Our power barely came back on yesterday Tuesday 12/6 around 5:00 p.m. but thank you whoever invented generators!